Tutorial: Chore Coat Toweling Jacket
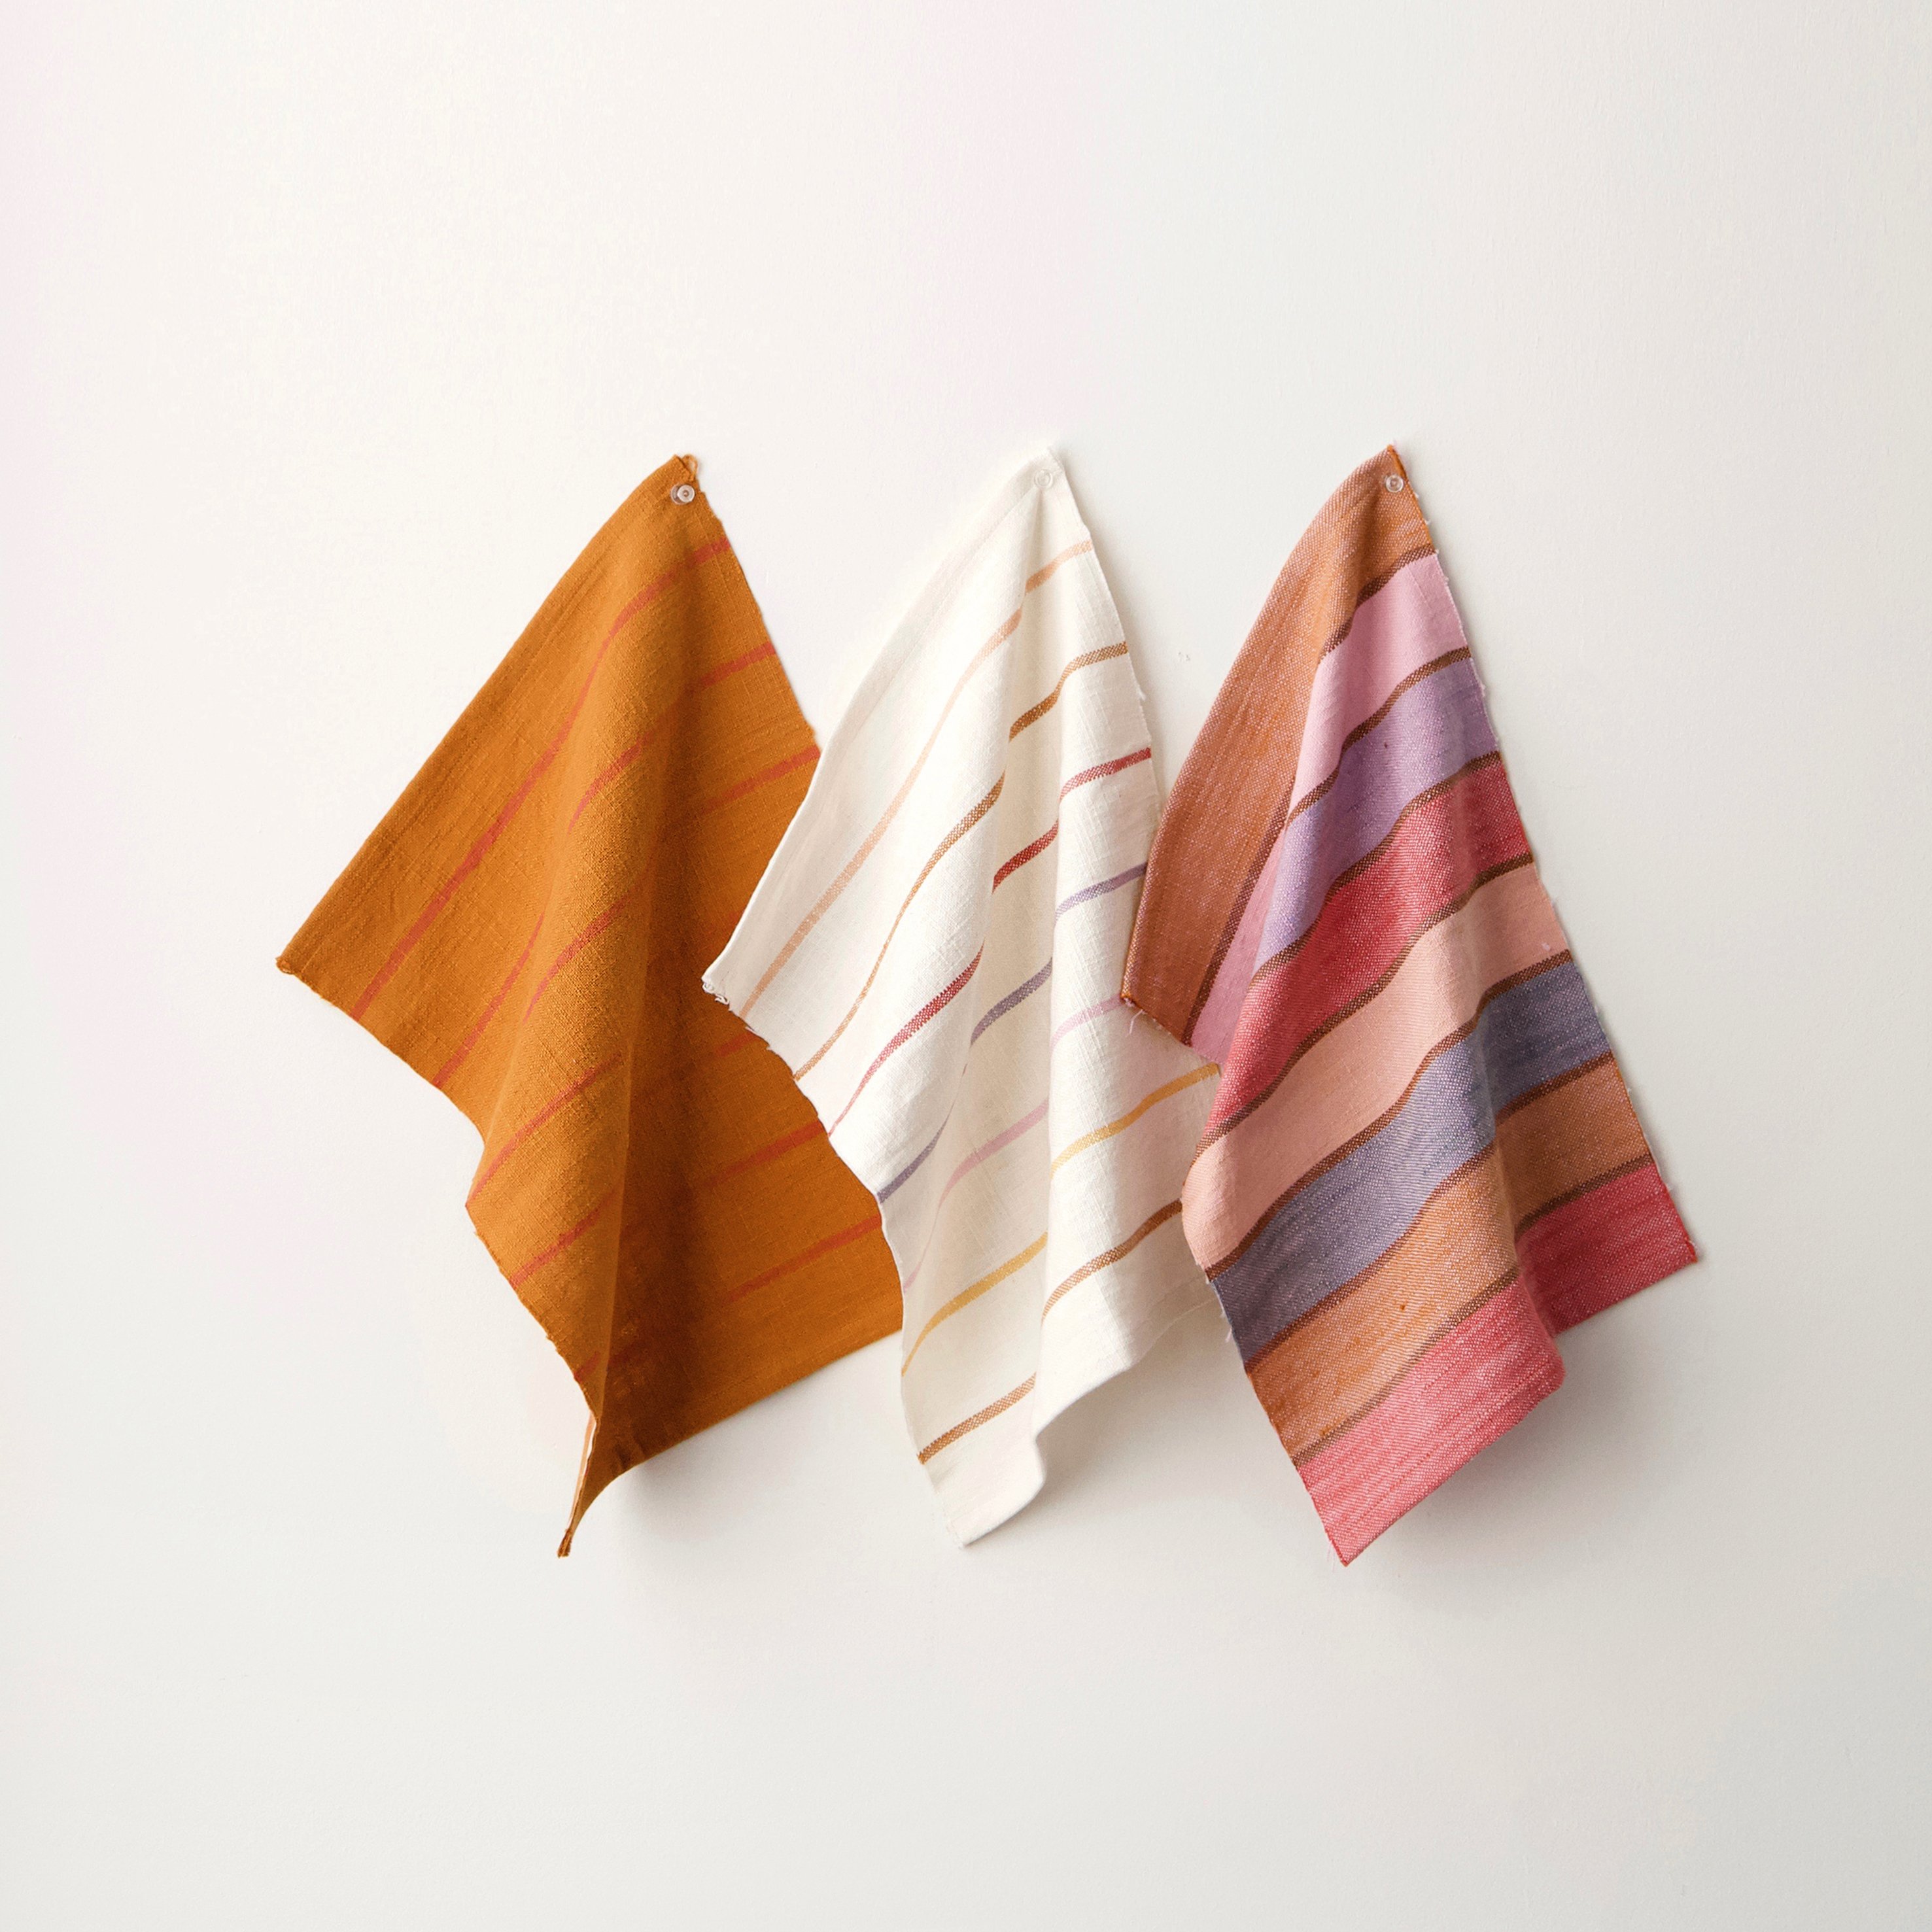
Alexia Marcelle Abegg created three colorways of her beautiful Chore Coat Toweling as part of Warp and Weft. The fabric is the same as her Chore Coat solids - thick, squishy, nubby cotton - but the toweling is pre-hemmed on two sides and has a width of 16".

The toweling makes great - well - towels, as well as other kitchen textiles like napkins, placemats and runners, but Alexia also came up with a clever way to make it into a loose fitting jacket, utilizing the pre-hemmed edges for some shortcuts. It's a great layering piece to throw over a tshirt and jeans, use as a coverup, wear around the house. The fabric is nice and soft and comfy too.
Because the front and back are flat rectangles, they form a sort of cocoon shape around your back when you wear them.
You can also make this jacket out of Alexia's solid Chore Coat fabric; we'll provide side instructions for that at the end.
HOW TO MAKE THE CHORE COAT TOWELING JACKET
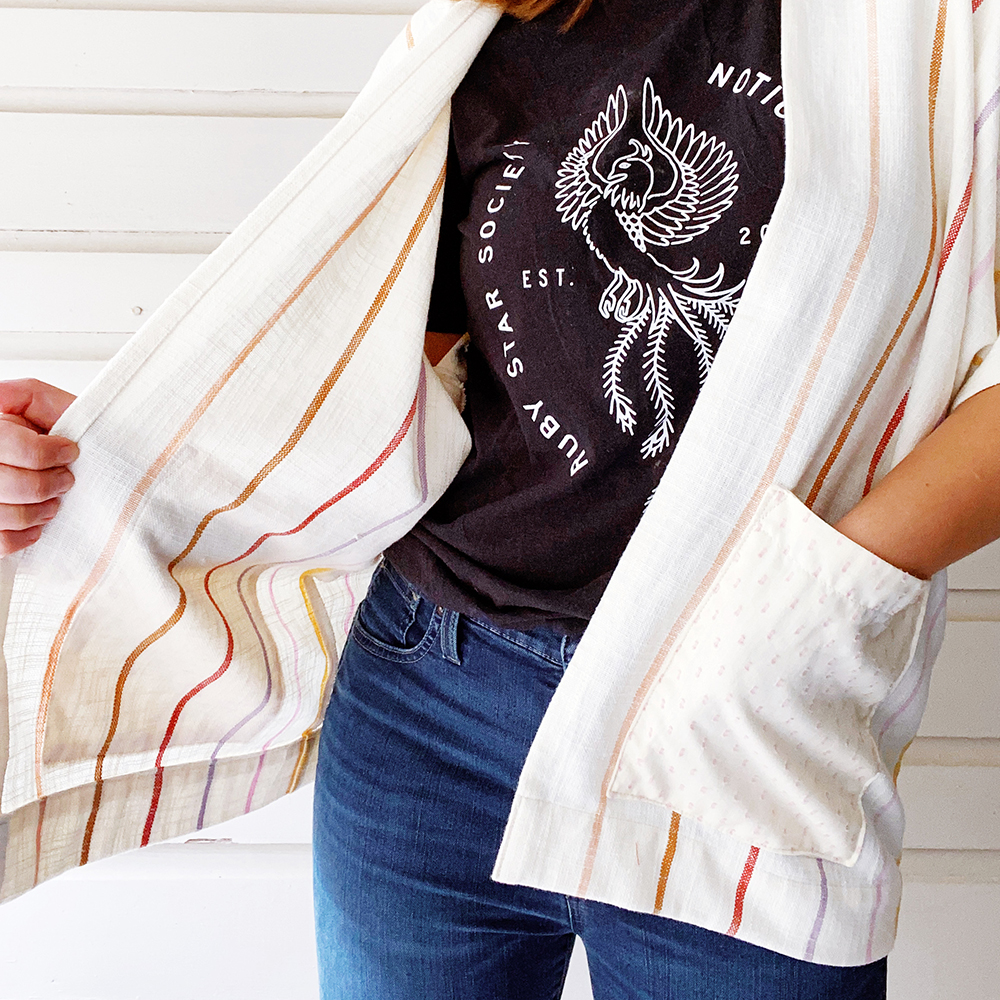
To start, decide how long you want your jacket to be, from shoulder to hem. We will call this number X. For reference, the multicolored jacket above is 30" for X, and the white one is 28". I am 5' 5" tall.
Double X and add 5" for hems. We will call this number Y. So for instance, if your X was 24", 24" + 24" + 5" = 53", so Y is 53". (For solid Chore Coat version, skip to end now.)
You need two lengths of toweling Y inches long (so, for a 24" finished jacket I need two continuous pieces, each 53" long.). Knowing that a yard is 36", this can inform you how many yards total you need. Also, you can colorblock and get 2 lengths that are different colors if you want - it's your jacket!
A note about fit - This jacket, as described, has a finished hip/waist measurement of 48", but with (2) 16" wide pieces of toweling folded in half, it's very easy to modify up to a 64" finished hip/waist measurement (instructions follow). For a larger finished measurement, you can follow the cutting instructions for the solid Chore Coat jacket at the end, and just cut your strip wider. Any amount you add to the strip will be multiplied by 4" in the finished jacket.
Lay out your two Y length pieces side by side, lining up one set of cut edges. This will be the back of your jacket, and the inside hemmed edges will form the center back seam. Be sure the stripes are arranged as you like - I turned one piece so that the colors of the stripes were mirrored on each side.
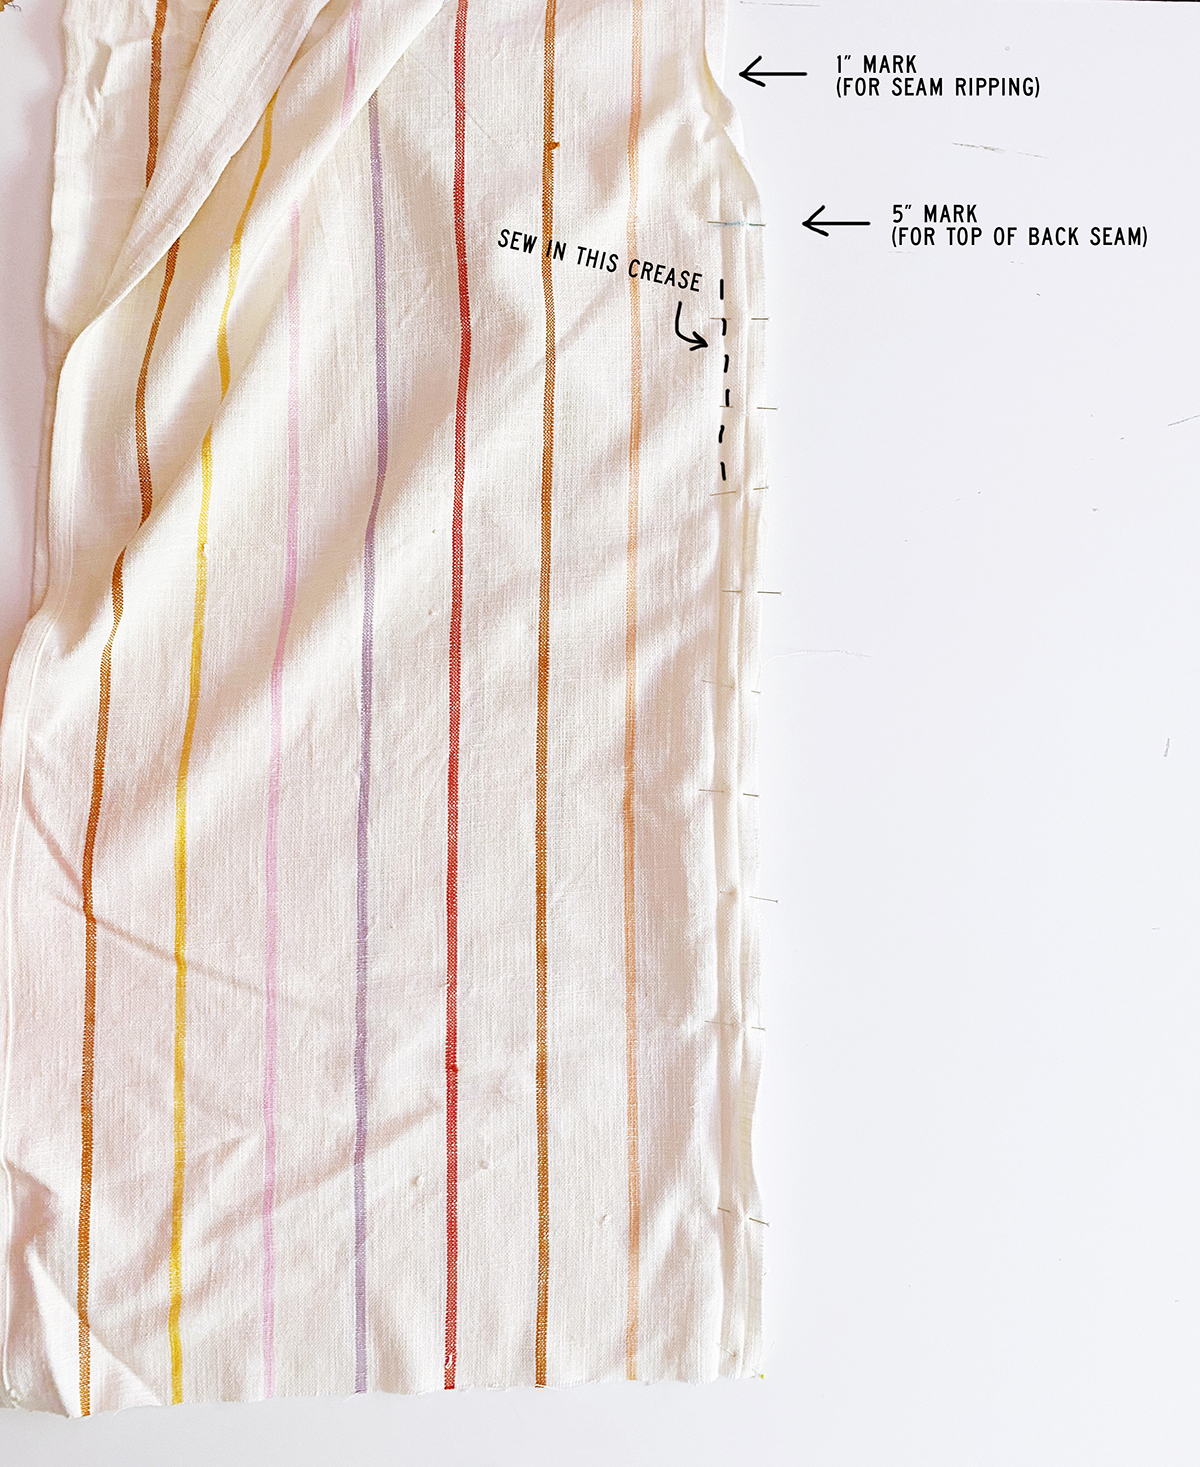
Fold both in half so that raw cut edges of each piece are aligned. The top folds will be the shoulders. On the inner edge of each back, measure and mark 1" and 5" down from the fold. Staring from the bottom back, seam rip the hem of each inner edge up to the 1" mark.
Unfold both hem folds and pin edges right sides together. If the hem won't stay open you can press gently, but don't press all the way flat, you'll need the creases. Stitching in the inner most crease and starting at the 5" mark, sew pieces together down to bottom cut edge, being sure to backstitch at the top. The seam allowance will be about 1", but follow the crease rather than the seam allowance marks on your machine.

Try on your jacket by putting the seam you just sewed at the back, and putting each side over your shoulders. Try to align the bottom cut edges of front and back. This is just to get an idea of the back neckline. If you'd like to raise or lower it, either sew a little bit further, or seam rip the center seam back a few inches (if you do that be sure to backstitch over the new top end of the seam).
Once you are satisfied with the back neckline placement, refold both seam ripped hems and pin. Topstitch along each side to re-hem the edge and secure the seam allowances. Be sure your stitching at the top overlaps the seam ripped end of the factory hem stitching.
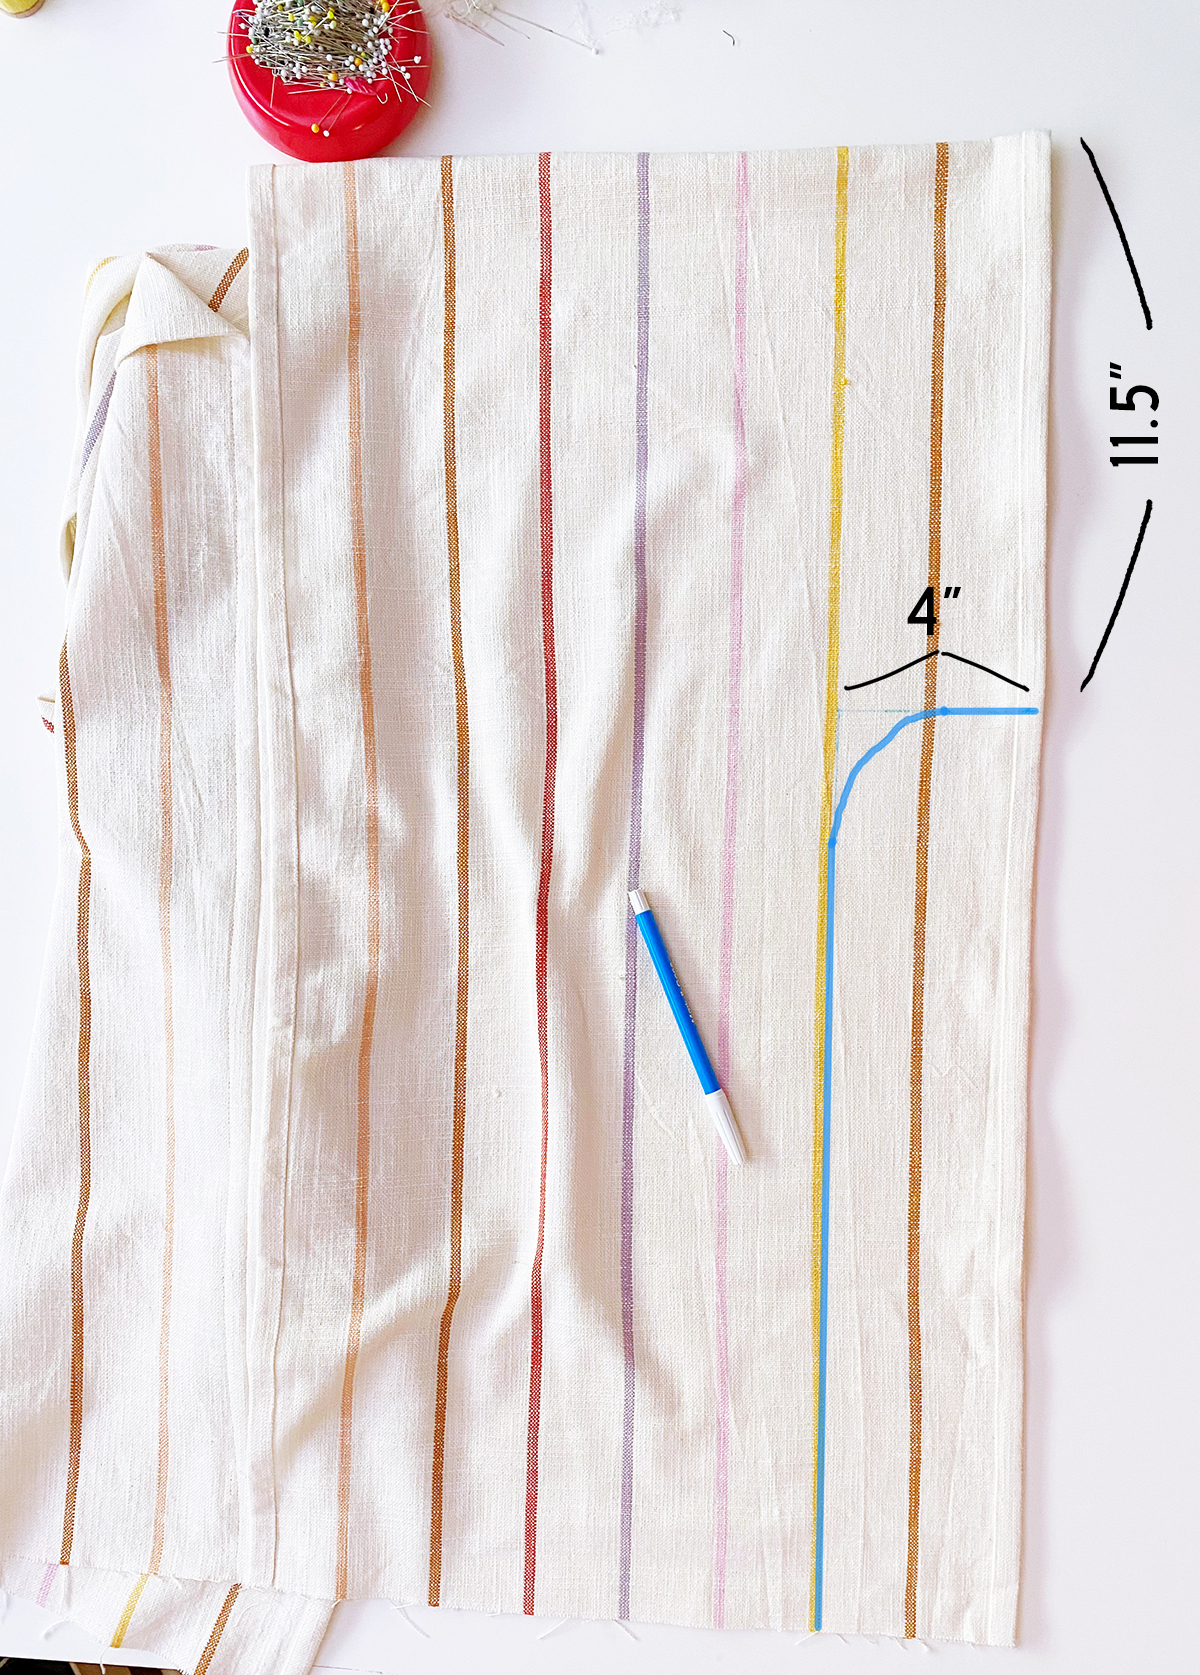
Bring front and back of jacket right sides together so that cut edges are aligned. Neatly line up the outer hemmed edges of one side and pin. Measure 11.5" down from the top folded edge (where your shoulder will be) and draw a 4" line perpendicular from the edge. Working down from there, mark 4" in from side edge down to bottom hem. Using a bowl or other vessel about 4-5" in diameter, turn the angle into a curve by tracing the edge of the bowl.

Pin well along marked line through both layers. Baste together along line (basting is just sewing with a long stitch length). Turn right side out and try on jacket to check fit. It will hang weird because all the extra fabric is still inside, but this is just to get an idea. At this point you could add room by redrawing the stitching line closer to the hemmed edge, or take it in by drawing the line further in from the edge. You could even forgo a curved seam and seam rip/join the side hems the same way you did the back seam to have straight side seams (this would give you the finished hip/waist of 64" as described in the beginning). You can also raise or lower the sleeve opening by changing the 11.5" measurement.
FYI that whatever amount you change the side seams will get multiplied by 4. So if you drew the line at 3" instead of 4", that extra 1" would end up being an extra 4" in the finished jacket measurement. This is such an inexact fitting garment that these precise measurements really don't matter a ton, but it can be helpful to have an idea what's happening if you're going to customize. If in doubt, just go by how it looks/feels when you put it on!
Once satisfied with the fit, sew with a normal stitch length along the line. Trim seam allowance below/outside of stitching line down to about 1/2" and finish with a zig zag stitch or a serger.
Repeat to sew other side seam.
To hem, turn bottom edge 1/2" towards wrong side and press. Turn another 2", press and pin. Stitch along upper folded edge to hem. Stitch hem closed at each end by topstitching across opening right along the edge of the jacket. (Clip corner inside hem opening if it's sticking out.)
To add pockets, cut (4) pieces 8" wide by 9.5" tall for pockets and pocket linings. (If using Chore Coat fabric for pockets, cut (2) out of Chore Coat and (2) out of a lighter weight lining, otherwise they will be too thick.) Place pocket and lining pairs right sides together and stitch around all four edges with 1/2" seam allowance, leaving an opening in the bottom. Clip corners and turn right side out through opening. Press, turning edges of opening in 1/2" as you do. Topstitch along the top edge of the pocket 1" from edge. (Fabric is Flicker from Warp & Weft.)
Pin pockets on right side of jacket, making sure they are smooth and flat and using the front jacket edge and hem edge to make sure they are straight. We recommend 2" in from front opening and 2.25 - 3" from the bottom edge, depending how long your jacket is. Once you have them pinned try the jacket on to make sure you are happy with their placement (try putting your hands in them!).
Topstitch around sides and bottom of pockets 1/8" in from edge to attach to jacket. For extra strength topstitch a triangle at each top corner as shown.
Give everything a nice press and your jacket is done!
SOLID CHORE COAT VERSION
For solid Chore Coat, your Y measurement is how much continuous yardage you need. Once your yardage is trimmed to Y length, cut two 18" wide strips from it. You can do this by leaving it folded in half, trimming 1" off the folded edge, then trimming the selvages off the remainder so that the final pieces are 18" wide.
Skip the seam ripping. Fold strips in half with short ends together and mark 5" down from fold on each. Pin together, aligning marks. Stitch from mark down to nearest short ends with 1" seam allowance. Try on as described above to check back neckline. Once satisfied, press seam open, and continue to press rest of long raw edge 1" to wrong side. Tuck raw edge under and press again. Topstitch along inner folded edge to hem open edges and secure seam allowance along seam.
Create side seams as described above, except mark 5" in from raw edge instead of 4" in from hemmed edge. Once side seams are done, hem sleeve opening by folding and pressing raw edge 1/2" twice towards wrong side and stitching.
Follow rest of instructions as described above.